Common Mistakes When Storing Wheat Berries and Flour at Home
A practical home storage guide to wheat berries and flour — moisture control, airtight containers, pest...

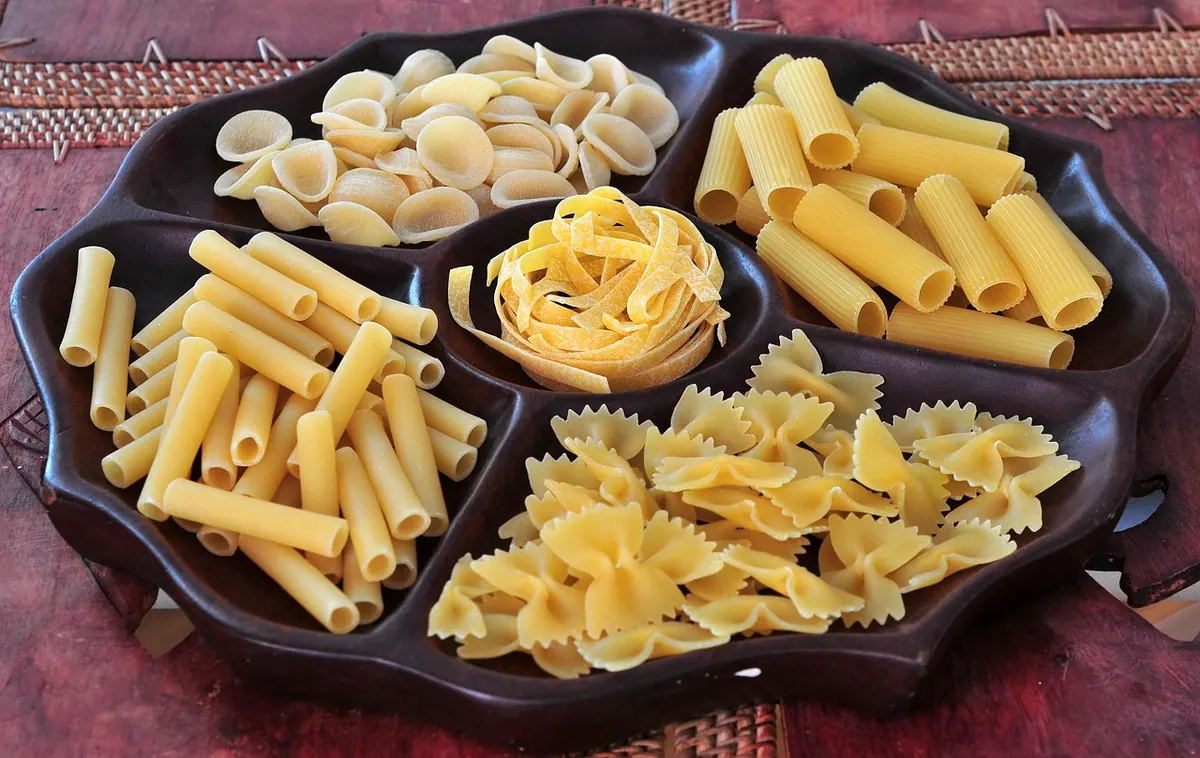
Orecchiette look like the simplest shape in the pasta canon: a small dome of dough with a thumbprint in the middle. Then you make your first one and it looks like a squashed coin. The second cracks at the edge. The third comes out perfect and you have no idea why. That is the whole learning curve, and it takes about an hour to get through. No machine, no eggs, nothing more exotic than good durum semolina. Just your hands, a knife, a wooden board, and enough patience to let the dough rest before you start rolling. Here is the whole process in the order you will actually do it.
Orecchiette are made from two ingredients, which means both of them have to be right. Use fine durum wheat semolina, the kind sold as semola di grano duro rimacinata. Coarse semolina works too, but the dough stays speckled and slightly gritty, and the surface of the finished ear is rougher. Bread flour or all-purpose flour will give you a softer, paler, less chewy pasta; it is a different thing altogether, pleasant but not orecchiette.
For four generous portions you want roughly 400 g (14 oz) of fine semolina and 180–200 ml (about ¾ cup) of warm water. A pinch of salt in the dough is optional; many Puglian cooks leave it out and salt the cooking water heavily instead.
Tip the semolina onto your board and make a wide well in the centre, wide enough that the walls do not collapse the moment you pour. Add the warm water a little at a time — not hot, just comfortably warm to the wrist — and stir with the fork, drawing flour in from the edges. Once the mixture looks like coarse crumbs, put the fork down and use your hands.
Knead for a good eight to ten minutes. The dough should end up firm, smooth, and slightly cool, closer to modelling clay than to bread dough. Press a thumb into it and the dent should fill back slowly, not spring away. If it sticks to the board or your palms, sprinkle semolina a tablespoon at a time. If it crumbles and refuses to come together, wet your hands and keep going; do not pour water straight in, because a small excess turns the dough soft and the shapes will slump later.
Weather matters more than any recipe. On a damp autumn day, hold back about 10 per cent of the water and add it only if the dough stays tight after five minutes of kneading. In a dry kitchen in February, you may need the full amount plus a splash. Judge with your hands, not the clock.
Wrap the dough in the cloth or set it under an upturned bowl and leave it alone for at least thirty minutes, an hour if you have it. This is where the gluten relaxes. Skip it and every rope you roll will shrink back like a rubber band while you work, the pieces will resist the knife, and the finished ears will be thick and cracked along the rim. The rest costs you nothing. Use the time to clear the board, salt the water pot's future parking spot, and get your sauce started.
Cut the dough into four pieces and keep three of them covered while you work with the first. On a board dusted lightly with semolina, roll the piece into a rope using flat palms, fingers spread wide, moving from the centre outward. Even pressure is everything: the rope should be straight and uniform, about 1 cm (a little under half an inch) thick — roughly the width of your thumb.
Too thick and the ears turn clumsy and slow to cook through. Too thin and they collapse into flaps. Rotate the rope a quarter turn every few passes and stretch it gently lengthwise as you go. You are aiming for something that looks like a plumber's candle.
Now cut the rope into pieces about 1 cm long, using a quick, decisive push rather than a sawing motion. Slide the finished pieces under the cloth as you go; exposed to air, cut dough develops a dry skin that fights the knife later.
This is the part worth slowing down for. Each ear is made in two motions, and both are short.
Lay one piece on the board. Hold the knife almost flat, blade angled slightly away from you, and press the edge into the dough. Drag it toward you in one steady stroke about 2–3 cm long. The piece should smear into a thin oval disc with a rough, ridged surface where the blade passed over it. Press too hard and you tear the dough; press too lightly and the knife skates without gripping. You will know within five pieces which pressure your dough wants.
Pick up the disc and turn it rough side down onto the tip of your thumb. Curl the thumb slightly and press the edges of the disc against your palm so the dough cups around it, then ease it off. The ridges end up on the outside of the dome and the smooth hollow on the inside, which is exactly where you want them: the rough outer face grips sauce, the cup holds it.
If you have no knife to hand, the older method works just as well: press your thumb into the piece and drag it toward you across the board to thin and texture it, then curl it over the thumb. Whatever you use, work in small batches of ten or so and check them against each other. Consistency comes from identical pieces of dough, not from identical effort.
The shape is not decoration. A thin centre cooks quickly, a slightly thicker rim keeps its bite, and the rough outer surface is the reason a spoonful of sauce does not slide off.
Fresh orecchiette can go straight into the pot, but they hold their shape better after half an hour on a cloth. To keep them longer, spread them in a single layer on a semolina-dusted tray in a dry room for about a day, turning once, until they feel hard and hollow. Store fully dried pasta in a paper bag or a jar with the lid slightly loose; in humid weather, cook them fresh rather than risk mould.
Boil them in plenty of well-salted water — at least five litres for every 500 g — and never add oil. Fresh orecchiette take three to five minutes; dried ones need eight to twelve. Start tasting early. The thin centre softens fast while the rim stays chewy, and that contrast is the point.
Drain them slightly underdone, keeping a mugful of the cooking water, and finish them for a minute in the pan with your sauce and a splash of that starchy liquid. The cups fill, the ridges catch, and the sauce clings in a way it never does on a smooth noodle. Bitter greens with anchovy and chilli is the classic; sausage and tomato, or cherry tomatoes crushed in the pan with a little ricotta, both work beautifully.
Your first batch will be uneven. Make them anyway, cook them anyway, and eat them with something generous on top. By the third batch your hands will have learned the pressure for the drag and the exact angle of the thumb, and you will stop counting. Freeze any excess on a tray, then tip the frozen ears into a bag; they go into boiling water straight from frozen with an extra minute on the clock.
Photo: Polette2 / Pixabay
A practical home storage guide to wheat berries and flour — moisture control, airtight containers, pest...
A practical look at how stone mills grind grain, why the flour comes out in so many particle sizes, and...
A same-day whole wheat focaccia with olive oil and rosemary — 80% hydration, folded rather than kneaded,...